A trigger is a special type of stored procedure or action that allows you to setup automatic reaction runs in response to conditions or events. In this blog, we will discuss how to configure triggers in this Office 365 ticketing system and explore the different types of triggers available.
Want to automate your ticket process?
👉 Book a free meeting to learn how to set up triggers in Helpdesk and boost efficiency.
Table of Contents
Adding a new trigger to SteadyPoint SharePoint Help Desk
You can create a new trigger in SteadyPoint Office 365 ticketing system easily by following the steps below:
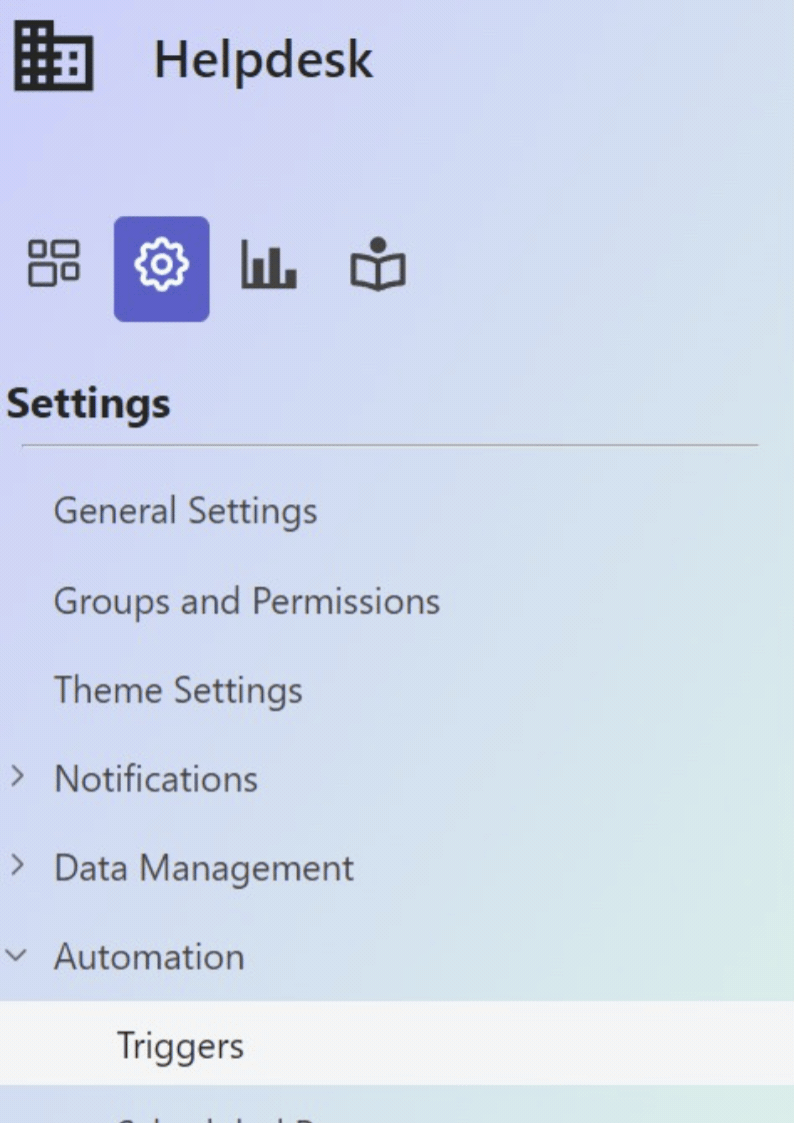
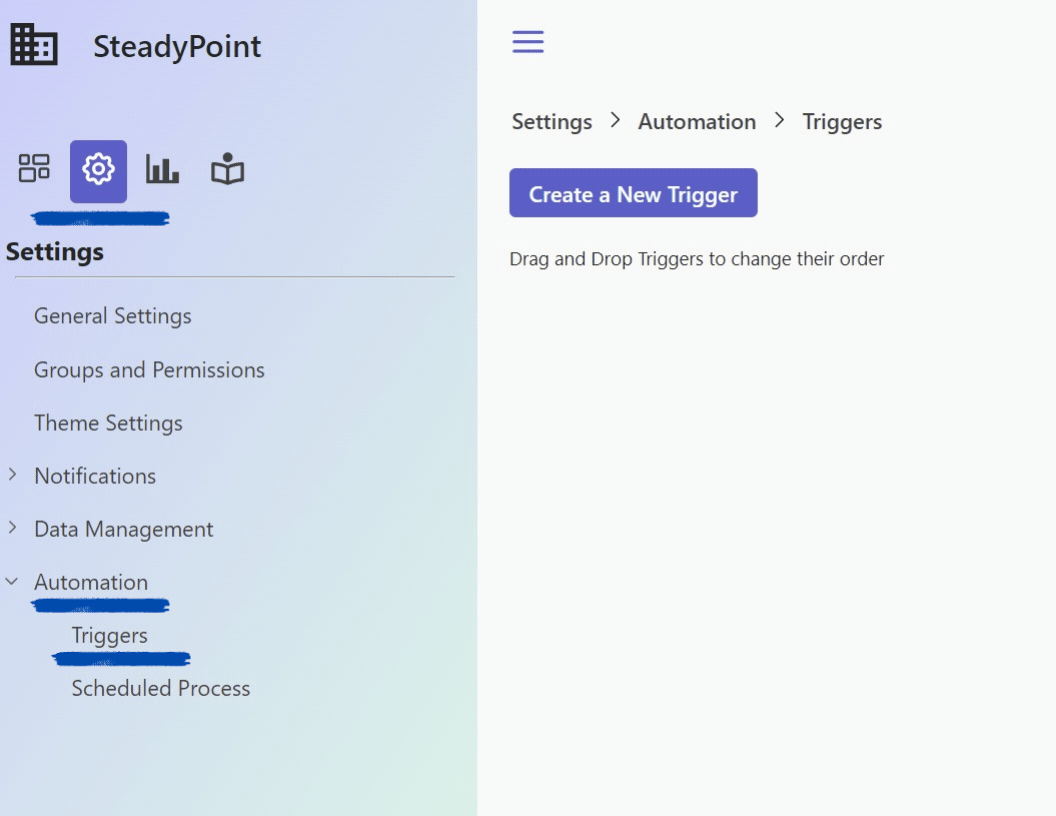
- Select Automation from Settings
- Select Triggers
- Click on Create a New Trigger
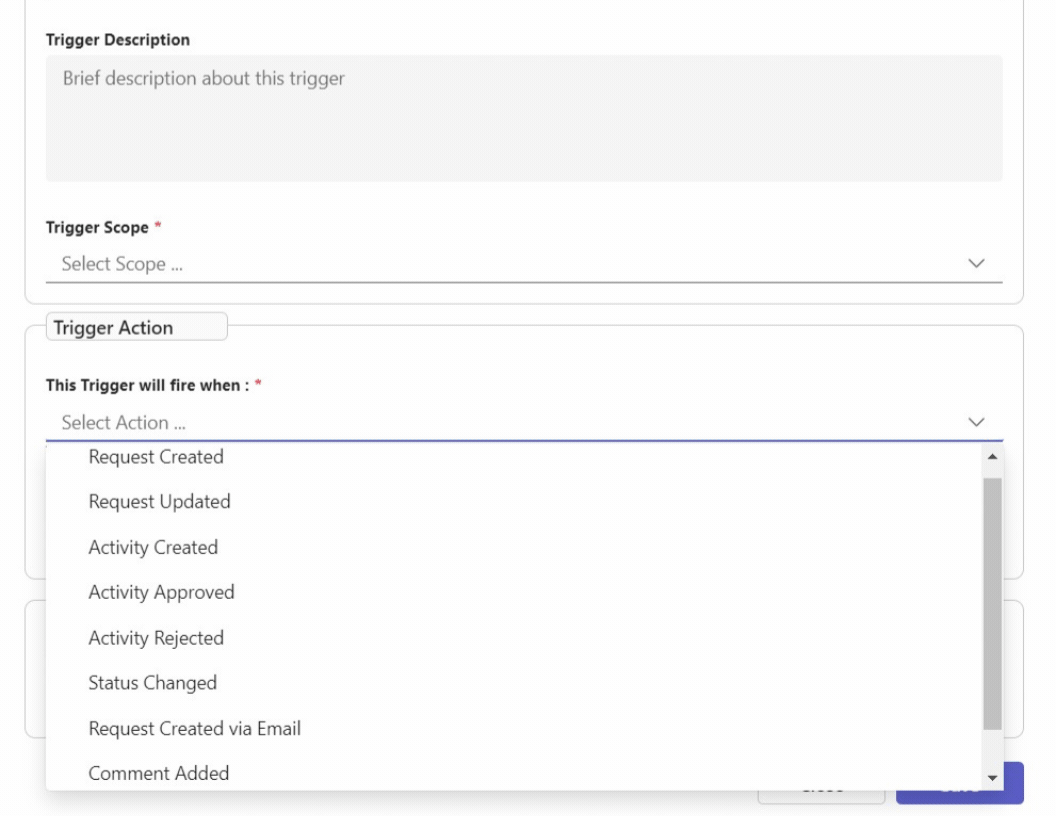
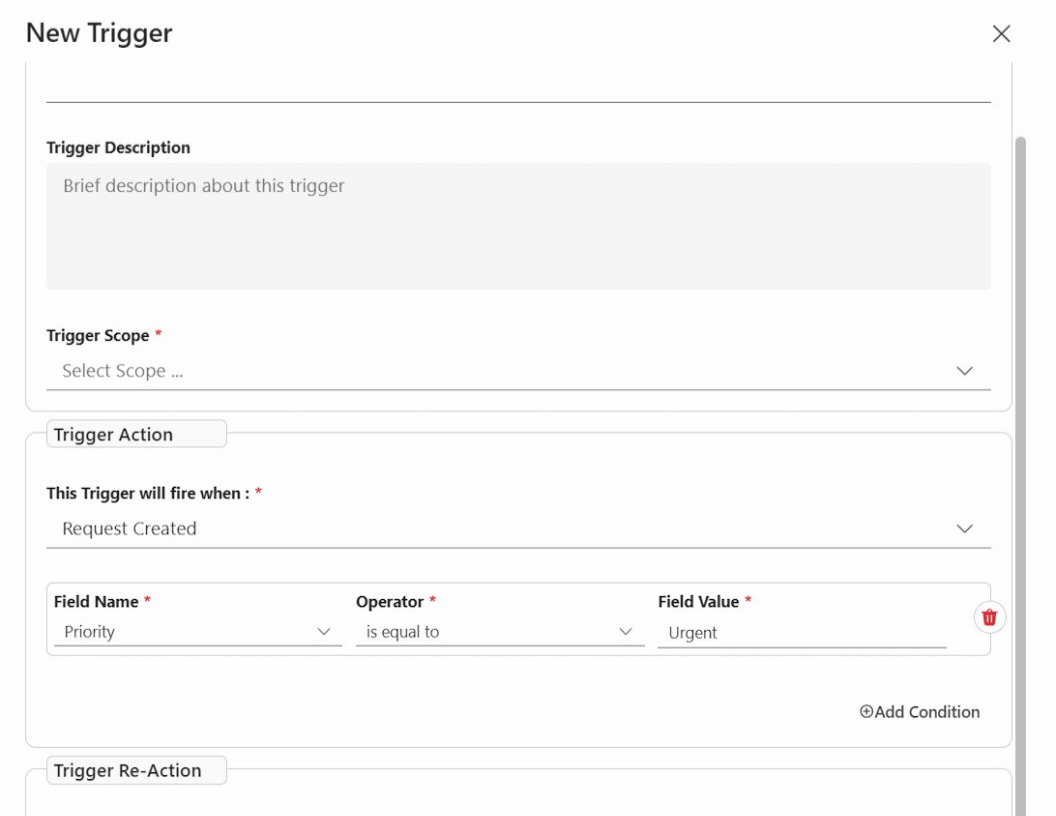
- Fill in Trigger Information
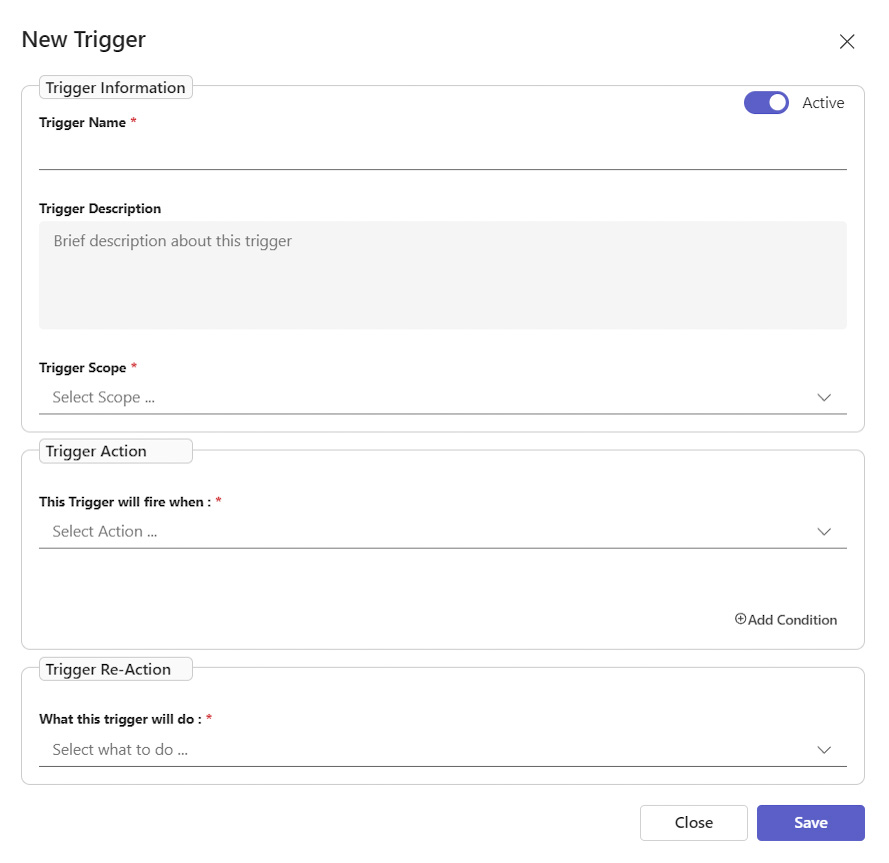
- Trigger Name: For example – Tickets assigned to me
- Trigger Description: Enter a description for the trigger
- Scope: The department/ departments the trigger will be activated in
- Trigger Action: Select an action from the drop down list to use them as the action triggers (Request created, request updated, activity created, activity approved, activity rejected, status changed, request created via email and scheduled process, and comment added)
Under the Ticket updated option, the below are the values that are considered updates for the ticket:
1- Ticket subject
2- Ticket status
3- Ticket owner
4- Ticket assignee
5- Priority level
6- Department
7- Request Type
8- Ticket Watchers
9- Ticket Resolution
10- Ticket description
The “Ticket Updated” action will apply to existing tickets and will be triggered when any of the specified values are updated.
- Trigger Condition: It is worth mentioning that you can specify one or more conditions that, if met, will fire a trigger reaction. These conditions can include system or custom values being equal to, not equal to, or containing a specific value, and other relations can be used, especially when dealing with numerical values. Note that for custom fields to appear here, they must be connected to SharePoint columns, and only number, URL, people, choice, radio ,lookup, and text custom fields will be displayed.
- Trigger Re-Action: Select a reaction in response to the trigger action.
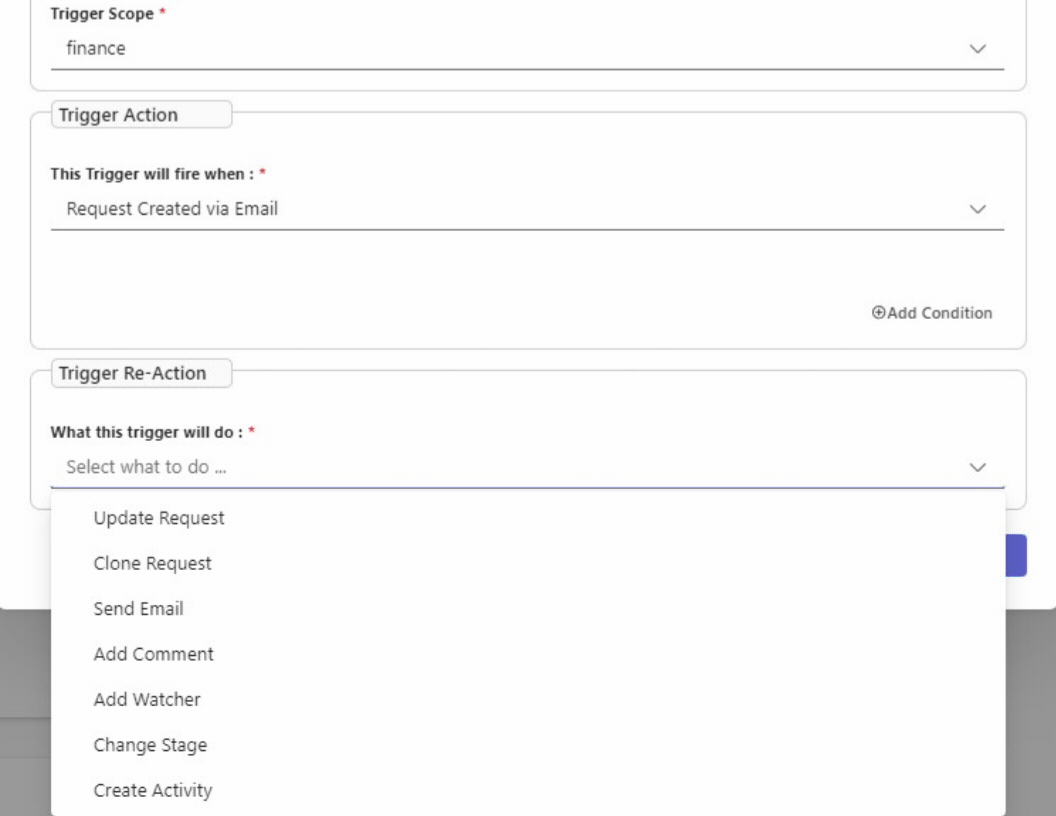
These include:
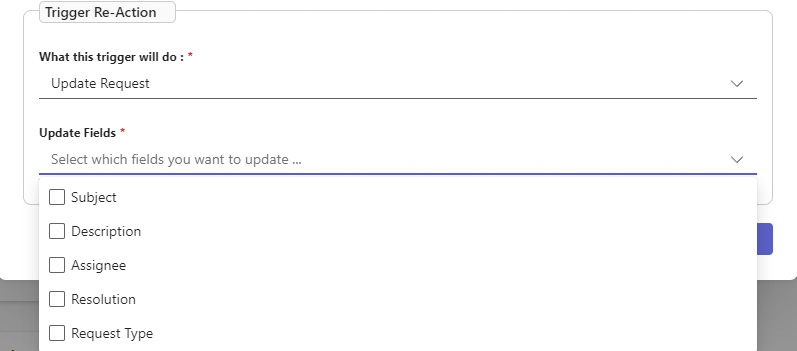
- Update request: Select a field in the ticket to update.
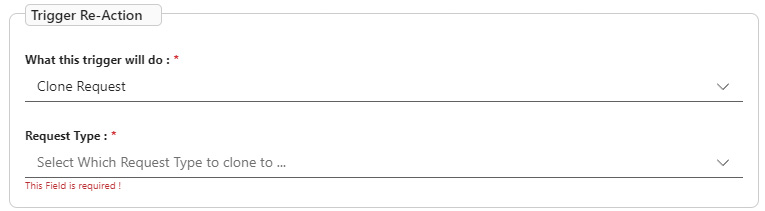
- Clone request: When cloning a ticket, you need to select the request type to which the ticket will be cloned. This means creating a new request in the selected request type and copying the ticket content from a previously created ticket, including the subject, description, resolution, watchers, comments, attachments, activities, and history. The cloned ticket will follow the form of the previously created ticket but will adhere to the workflow of the new request type
- Send email : Select an email template to send
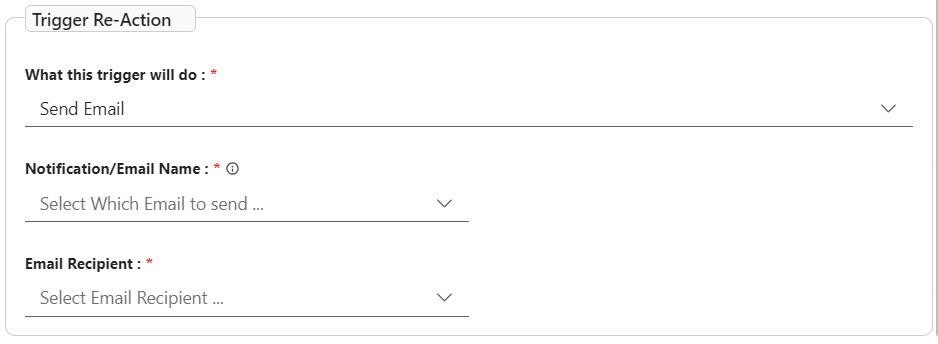
To create new templates: Go to Settings > Notifications > Custom Notifications
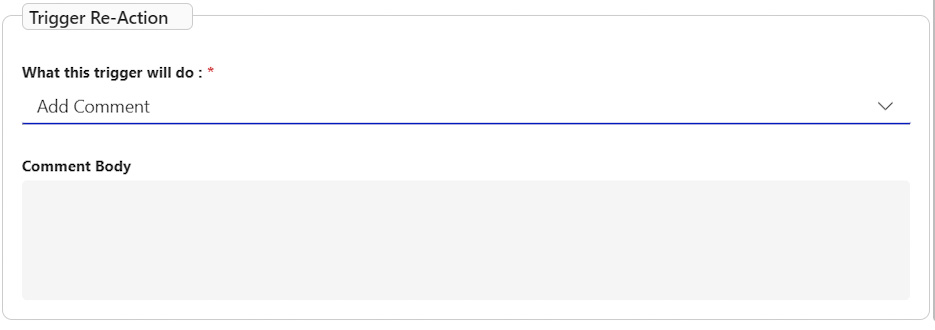
- Add Comment: Add a comment to be added to the ticket
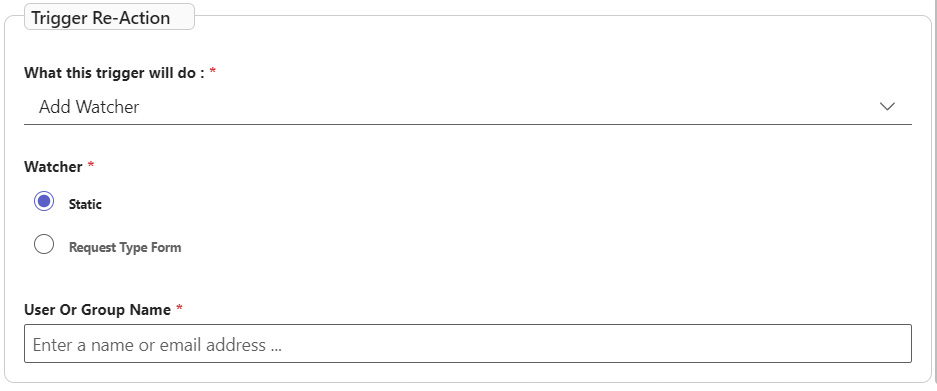
- Add Watcher: Add a watcher to the ticket, either choose a static watcher or choose the default watcher per Request Type
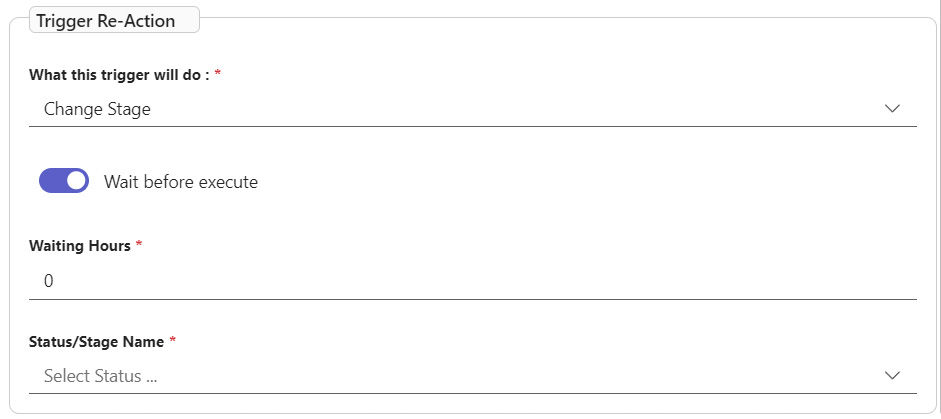
- Change stage: The “Change Stage” action is used to automatically change the stage of a ticket if the trigger conditions are met. For example, if the ticket activity is approved, the stage can be automatically changed to “Closed”. The user can also specify after how many business hours the stage will be changed.
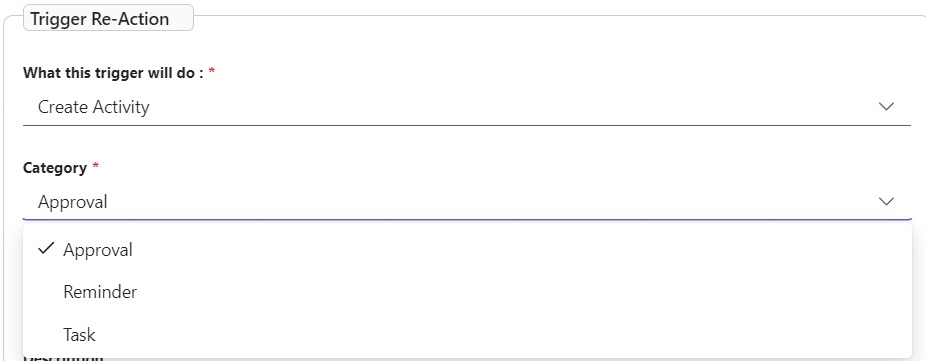
- Create activity: Add activities including Reminders, Tasks, and Approvals.