SteadyPoint Helpdesk offers two different methods for routing, or assigning, tickets to the appropriate person: automatic assignment and manual assignment.

To configure these options, it’s essential to utilize the workflow and form modules.
The following sections will discuss the two assignement types in detail.
Table of Contents
Automatic Routing
Automatic assignment is the pre-configured assignment; that means when the ticket is created, it uses the structure laid out for it to send it to the right individual or group. Automatic assignment is best used when you have a more complex structure, as you can set it up once and not have to select the assignee every time you create a ticket.
Don’t waste time assigning tickets manually.
👉 Install the app and let automation do the work – 30-day free trial.
Helpdesk pairs each problem catalog item with a problem handling team/individual using the assignment algorithm: That is way the system knows how to match each ticket type with its correct handler.
The following section provides a step-by-step guide on how to configure automatic assignment.
A. Select the Assignee in the Workflow
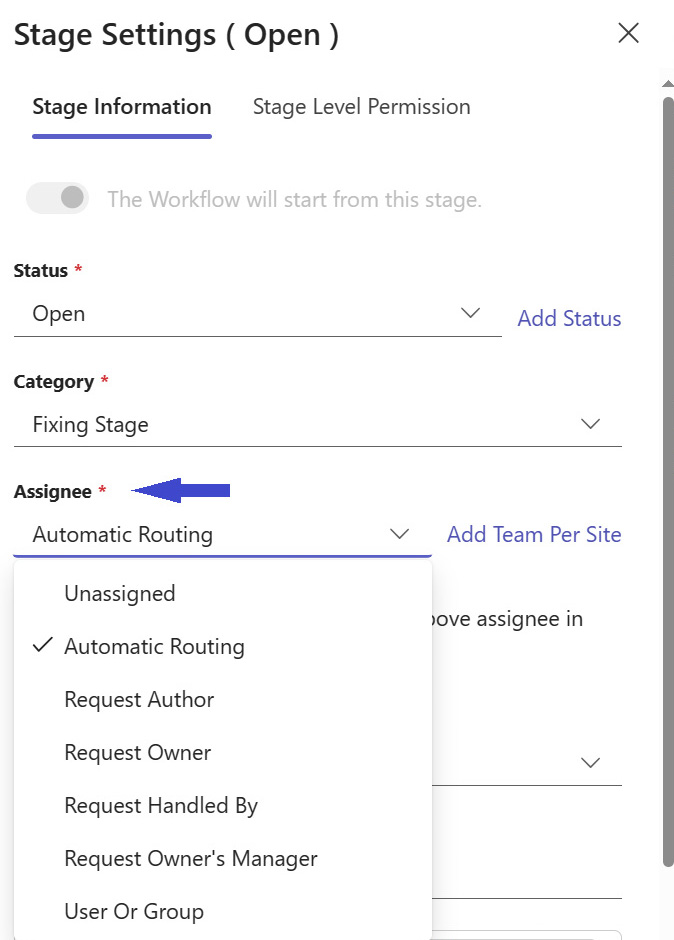
Admins can select the assignee for each stage from a range of options that include:
- Leaving the ticket unassigned.
- Automatic Routing (discussed in detail in a previous blog).
- Request author.
- Request owner.
- Request handled by: The person who has already handled the request becomes the assignee.
- Request owner’s manager.
- User or group: A specific user or group is assigned to handle the request.
It’s important to note that the “handled by” option will not function in the first stage because, at this point, the field is not yet populated.
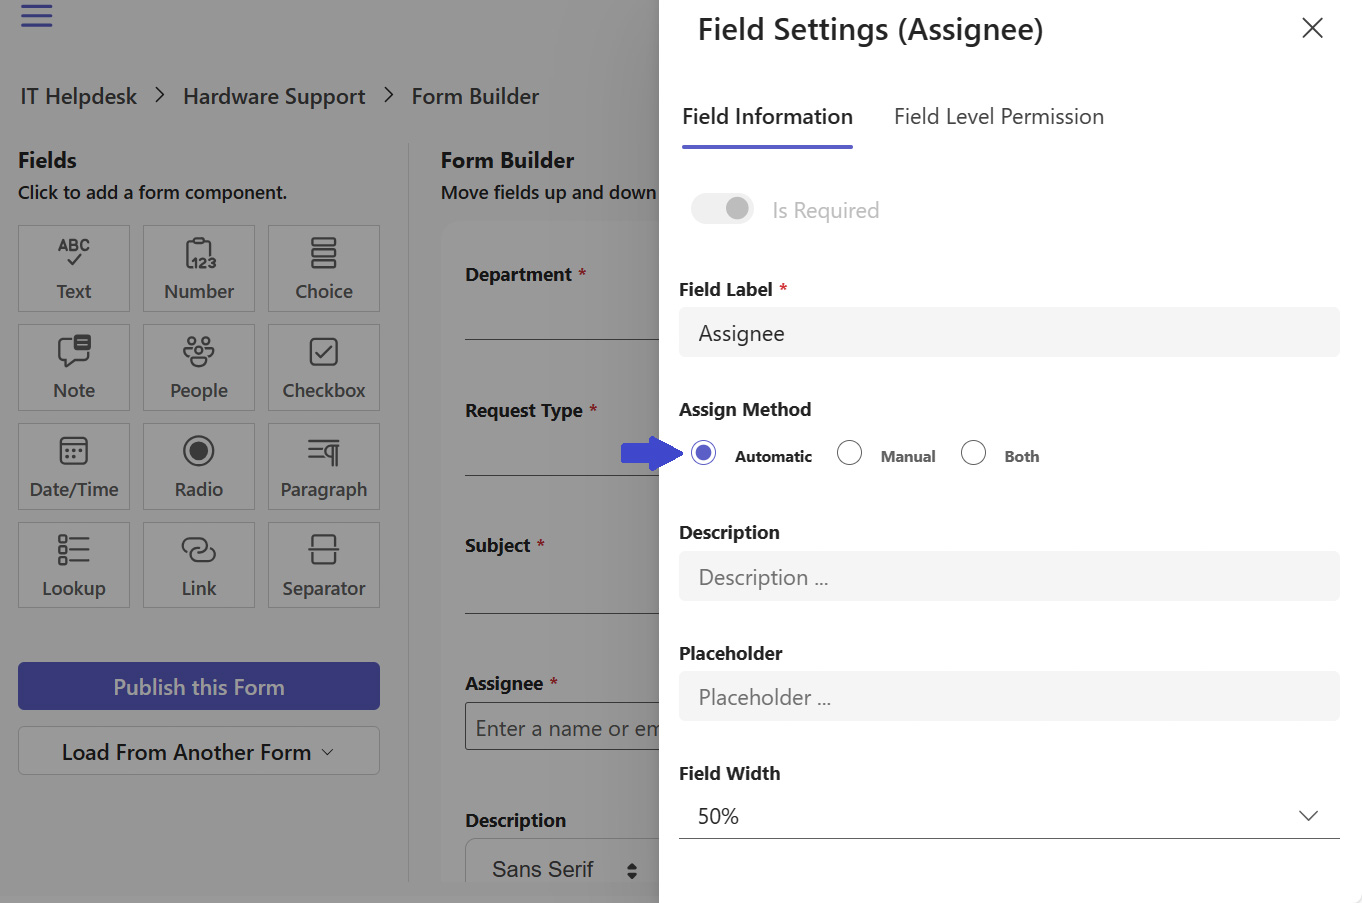
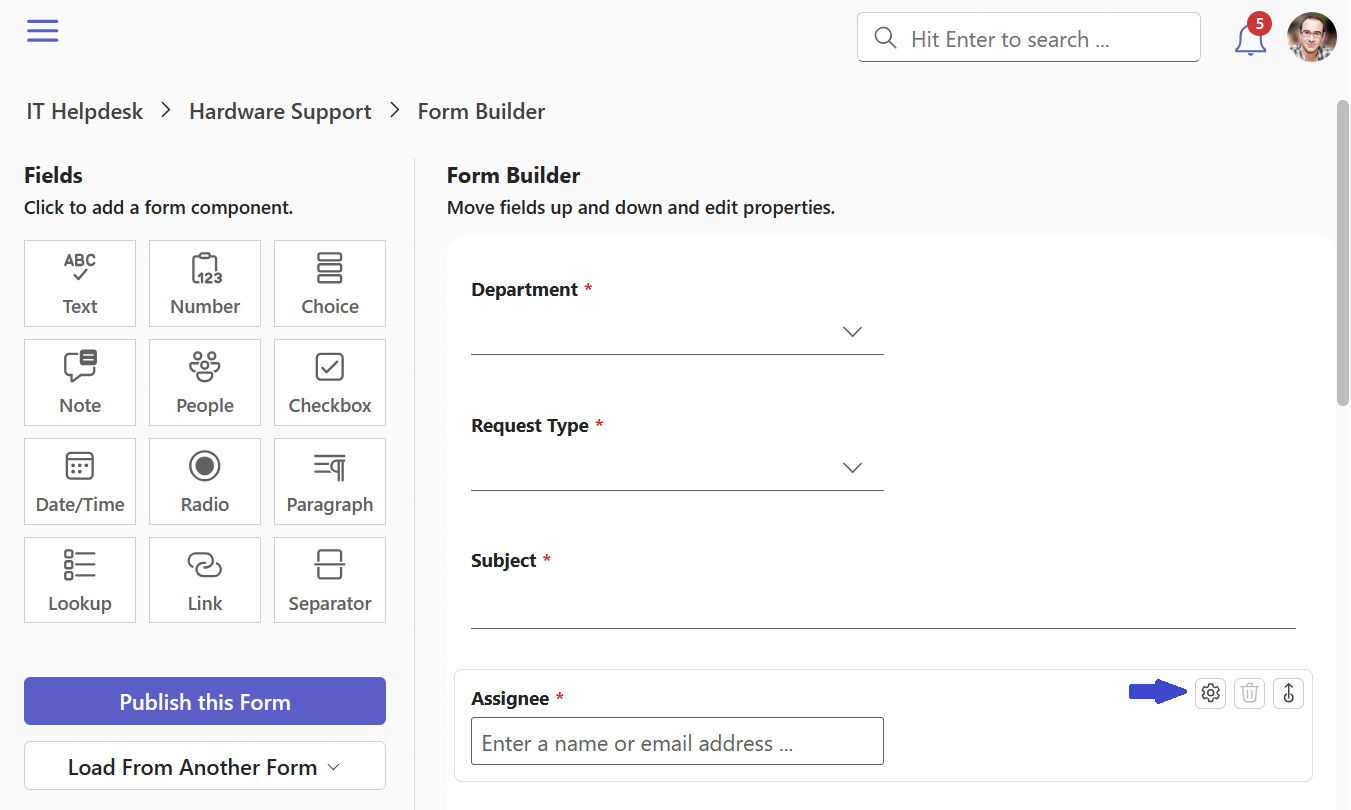
B. Enable Automatic Assignment in Forms
- By default, Helpdesk has automatic assignment turned off. To turn it on, start by heading to the Department menu > Request Type> Edit Form
- Edit the Assignee field.

- Enable Automatic routing.
Manual Routing
If you have a large number of ticket creators within Helpdesk, it is best to configure your routing through automatic routing. But what if you have a handful of ticket creators all whom are aware of who they want to handle their problems? Then it’s best to use manual routing!
To enable manual routing, follow the steps outlined below.
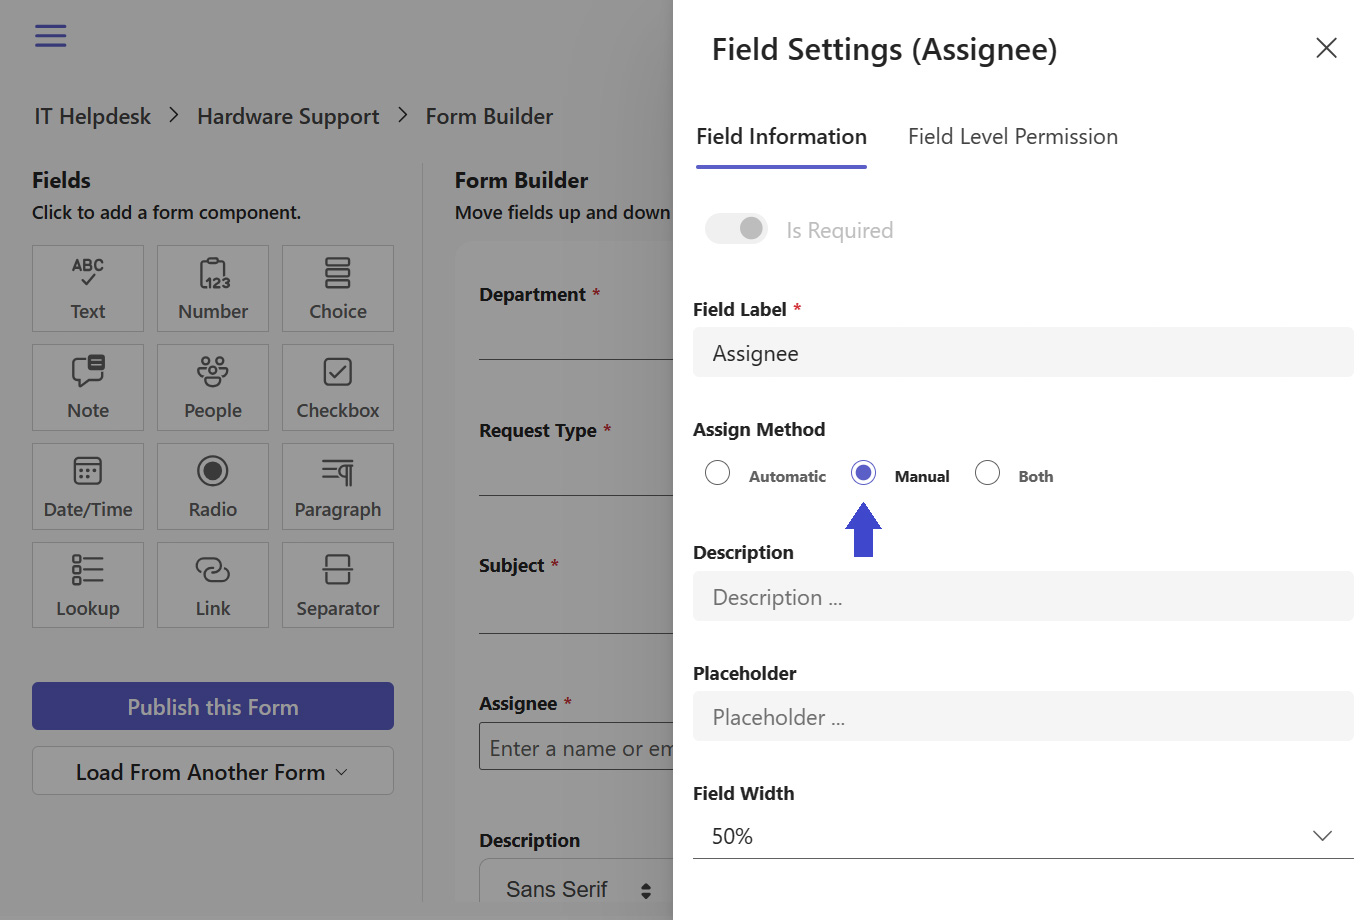
A. Enable Manual Assignment
- Start by heading to the Department menu > Request Type
- Edit the Assignee field.
- Enable Manual routing.
By following the steps above, you will have manual routing configured. However, since we have two types of departments—public and private—this will result in the following cases:
A.1 For Private Departments
The system assigns the ticket to the department’s default assignee by default. You also have the option to select from the list of department members only.
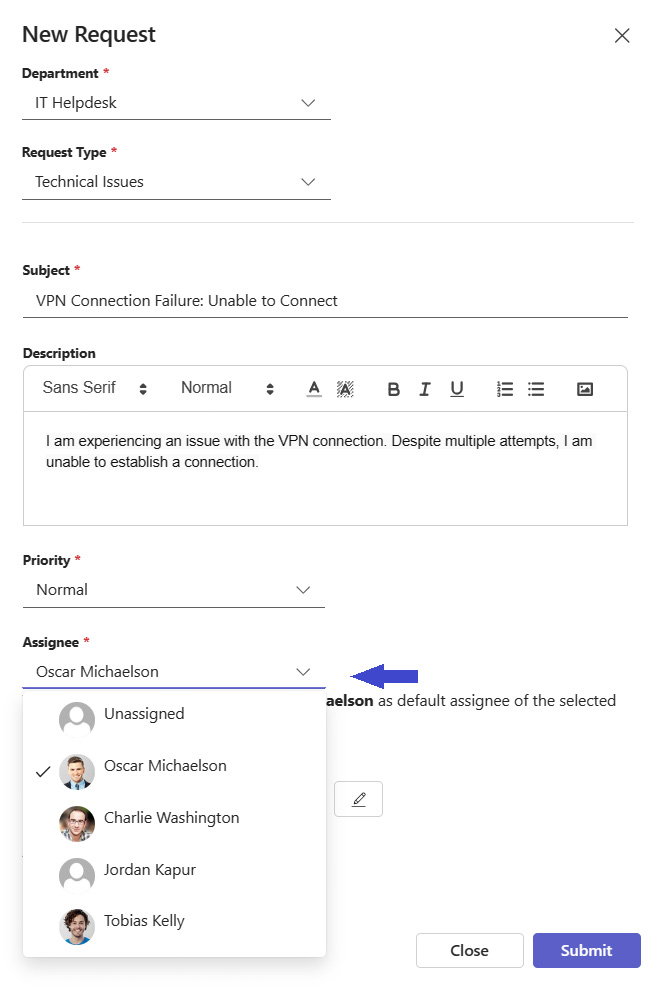
A.2 For Public Departments
The ticket is by default assigned to the department’s default assignee. You have the flexibility to select any user to work on the ticket by simply typing their name.
